Backpacking The High Divide Trail – Seven Lakes Basin Loop
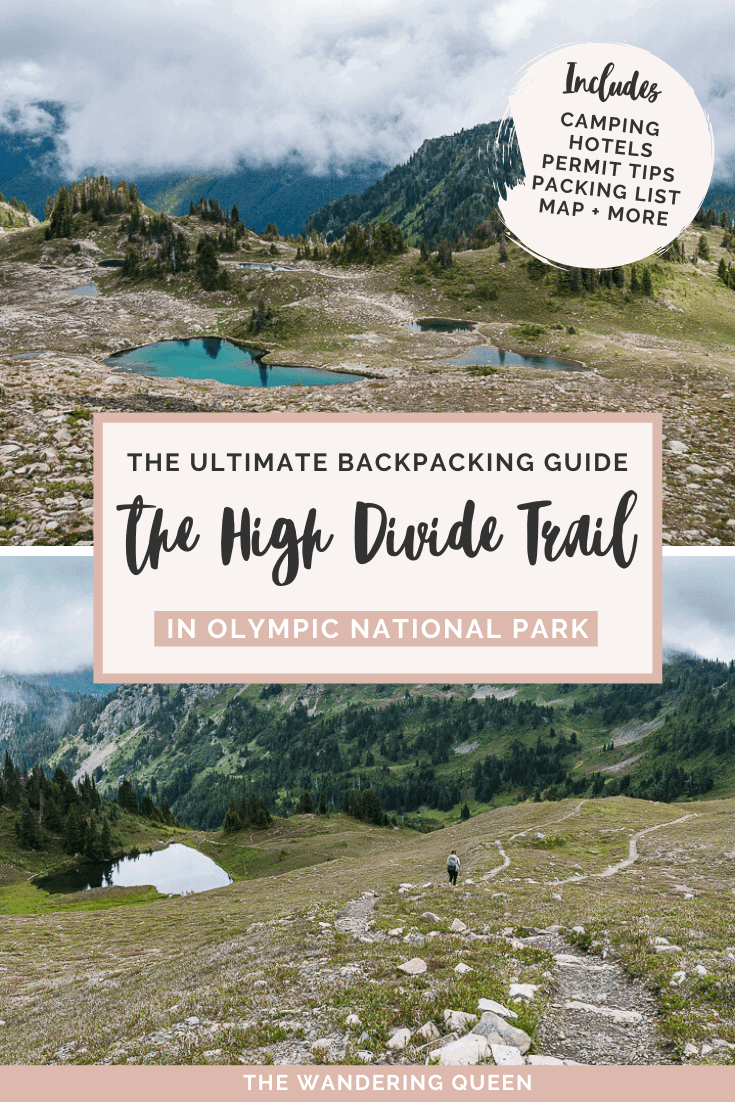
One of the most well-known backpacking trails in Washington is the High Divide Trail – Seven Lakes Basin. This stunning trail is filled with breathtaking lakes, tall mountains, striking ridge views, and a beautiful waterfall. But don’t let the beauty distract you from how challenging this trek is. This trail is around 19 miles roundtrip with about a 4,000 ft elevation gain. Few people decide to complete it in a day, while many others try their luck with a backcountry permit. Either way, the trail has spectacular views throughout and the typical Pacific Northwest Vibes tenfold. If you are searching for the perfect backcountry adventure in the Olympic Peninsula, then look no further. Below is all the information you need to plan your ideal backpacking trip through the Olympic National Park. Spoiler alert: it will be awesome.
Disclosure: This post contains affiliate links. If you click one of them, I may receive a small commission (for which I am very grateful for) at no extra cost to you.
Download my free Outdoor Photography Guide
Where Is The High Divide Trail
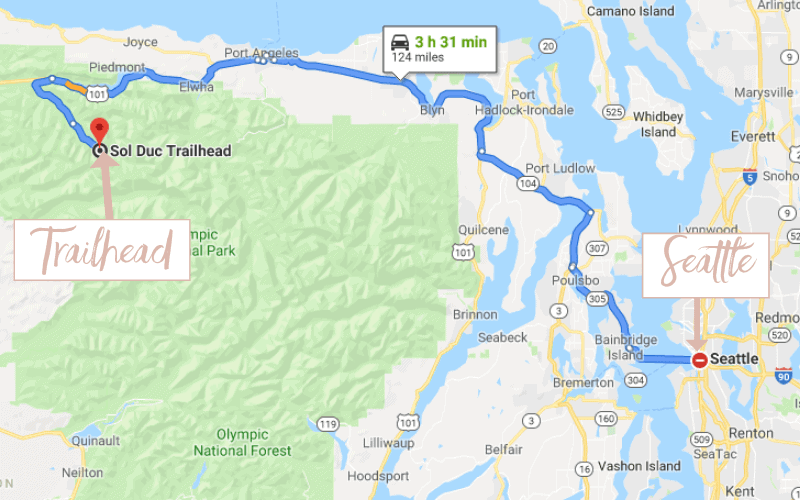
The High Divide Trail is located on the Olympic Peninsula, about 3 and a half hours away from Seattle. If you are in Seattle, you can either take the ferry across or drive down to Tacoma and drive around. Both options are around the same time, but the ferry might cost more. Here is more information on the ferry times.
The trailhead for the High Divide Trail is the Sol Duc Falls trailhead. So you will spot many families and hikers at the beginning of the trail. You will also have to pay an entrance fee to get inside the national park. An America The Beautiful Pass is what I always use.
Seven Lakes Basin Weather and Best Time To Go
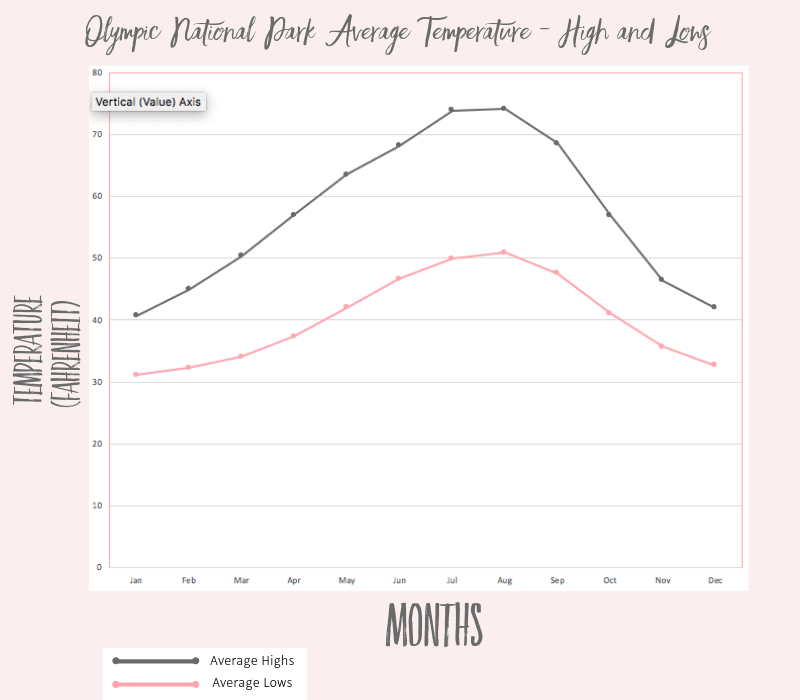
The best time to attempt the High Divide Trail is from Mid July through Mid October. May, June, and the beginning of July have a chance of snow on the trail. September and October are great times to spot the fall colors, although the weather might be iffy.
High Divide Seven Lakes Basin Permit
Due to the popularity of this trail, a permit is required to stay overnight. You do not need a permit if you are day hiking. Every March of every year, the permit process begins. I will note that we were able to obtain a permit a few weeks before our trip, but it was slim pickings. We got the worst campsite out of the whole trek. So I highly recommend obtaining the permit in March.
50% of the campsites are reservable, which mean you might have a chance on getting on a First Come First Serve campsite. But, I am usually not one to gamble.
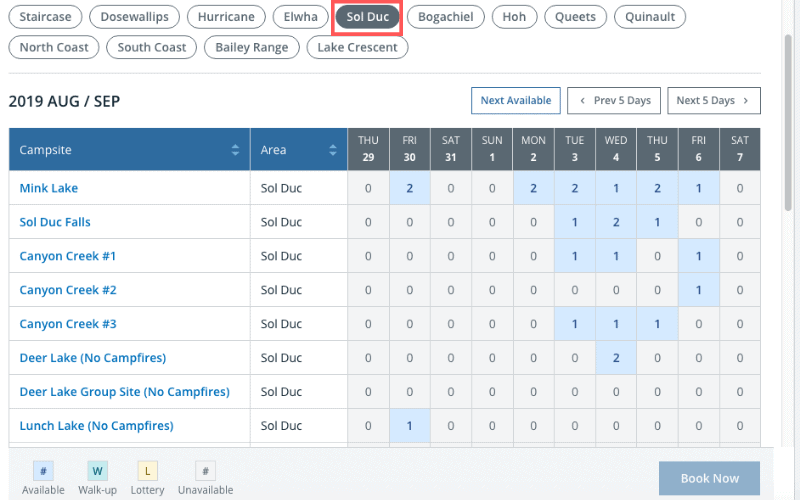
To reserve your permit click here. It the picture above, it shows some of the campsites available for the High Divide Trail. Make sure to click “Sol Duc Falls”. I have also provided a map of the campsites below in the next section.
High Divide Seven Lakes Basin Map
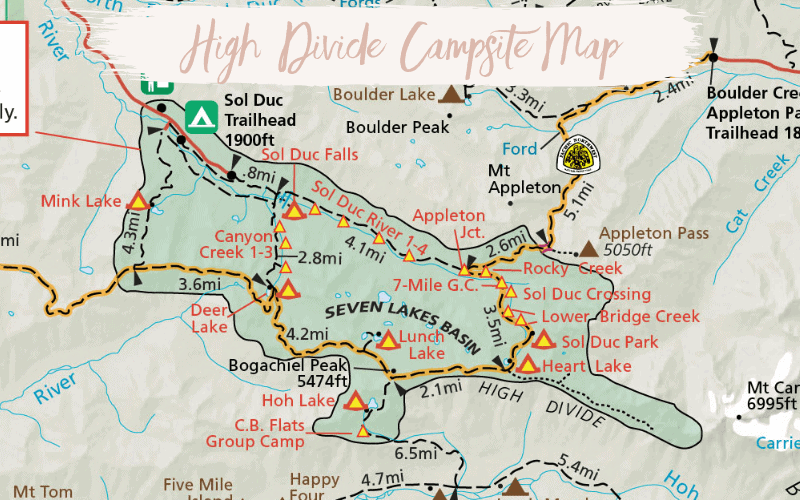
The map above shows all the campsites throughout the trail. If you are backpacking for only one night, I highly recommend picking Appleton Junction, Rocky Creek, Sol Duc Crossing, Lower Bridge Creek, Sol Duc Park, and Heart Lake. Honestly, my favorite campsite I saw was the Sol Duc Park and Rocky Creek Campsite.
I also recommend getting an app or an official trail map for this hike. There were a few times that we were confused about where to go.
All the best views in the state
100+ WA Hikes
Embark on Washington’s best trails with our eBook! Inside, find top hikes, expert tips, and stunning views, making every adventure unforgettable. Dive into the beauty of Washington’s outdoors now!
Hotels Near The High Divide Trail
Ok, so I have included the nearest hotel near the trailhead because I WISH we had booked a hotel room after the hike. Seriously we were exhausted, and the last thing we wanted to do was to jump in a car and drive 3 and a half hours to Seattle. We had also met a day hiker that thought of the idea beforehand, and we were so jealous, mainly because the hotel has hot springs! This idea sounded so perfect for our sore muscles, but sadly there were no rooms available. >Book The Hotel Here In Advance
Read More: Where To Stay In Olympic National Park
What To Pack
- Sunscreen: If you get burned easily like my husband, this is needed. >Buy Sunscreen
- Bug Spray: In case there are bugs. >Buy Bug Spray
- Hiking Boots/Shoes: If you use tennis shoes you can easily hurt your toes hitting a rock by accident (Trust me I have done it so many times). >Check Out My Hiking Shoes
- Hiking socks: Having the correct socks helps prevent blisters. Smart Wool is probably my favorite brand out there. I also love how they now have pink socks too 🙂 >Buy Hiking Socks
- Refillable water bottle: I always bring a Hydroflask on all my adventures. They are on the heavier side, but I know for a fact they will not break. I have had a few cheap water bottles break on me before. >Check Prices Now
- Water: Stay nice and hydrated. There are many spots throughout the hike where you can grab water. Just make sure to bring a water filter. I have linked my water filter below.
- Sunglasses: Make sure to pack some sunglasses. >Check Out These Sunglasses
- Snacks: The best snacks are jerky, nuts, energy bars. Cliff Bars are great for hiking.
- Camera: The camera I have linked was one of the first cameras I started using on my travels. The Sony A6000 is an excellent camera for people that want to start improving at travel photography. >Buy Sony Camera Here
- First Aid Kit: This is one of the first things I bought when I first started going on adventures. It is super portable. >Buy This Awesome First Aid Kit Here
- Day Pack In Case You Are Day Hiking From One Of The Campgrounds: The REI bag I have linked, we have had for seven years now, and it is still going strong! >Buy This Great Quality Backpack
- Leggings or Hiking Pants: I love wearing leggings while hiking because I love how comfy they are but don’t forget that the PNW is known for being rainy. I still try to wear leggings as much as I can and only wear them in Olympic NP if I know it won’t rain that day. Either way, here are some excellent hiking pants that are super durable and that I wore during this trip. >Click For My Favorite Hiking Pants
- Breathable sweat-wicking shirts
- Sports Bra: For women.
- Jacket: It can get pretty chilly. Bring a Jacket! >Buy My Favorite Jacket
- Light Jacket: The PNW weather can be unpredictable. That is why I brought three jackets with me. It wasn’t so cold when we hiked, so I wore a light jacket on the trail. >Buy This Light Jacket I Love To Wear on trails
- Rain Jacket: In case it starts pouring on you, which is always a possibility in the PNW. This is my PNW hiking rain jacket >Buy A Great Rainjacket Here
- Backpack 50 – 65 Liters: The Osprey (which I have linked) is known to be one of the best brand of backpacks out there. >Buy my Awesome Backpack
- Backpack Cover: I luckily didn’t have to use this but it is necessary to have on hand. >Buy A Handy Rain Cover
- Tent: I just purchased this new Nemo 2 Person tent, and it packs so small, and it is light! >Buy The Nemo Backpacking Tent
- Jet Boiler: This is a portable mini stove that will boil water for you. This is great if you are bringing dry food >Buy My Jet Boiler
- Propane for Jet Boiler: This can be bought at Walmart or REI on the way to the Olympic National Park.
- Sleeping Pad: A sleeping pad is pretty much a small, packable inflatable mattress. The one I have linked is known to be the best one out there in the market. It will keep you warm, and it is pretty light. My husband has this one. >Check Out The Best Sleeping Pad
- Dry Food: Dry food is the perfect food for when you are backpacking. All you have to do is add boiling water. Let me warn you that most dry food doesn’t taste amazing, but it is good enough after a long day of hiking. >Check Out Some Of My Favorite Dry Food
- Spork: A spoon and fork in one. >Buy A Spork Now
- Headlamp: A headlamp is an absolute must! It is a lot more portable and easier to use than a flashlight. >Buy A Headlamp Now
- Pillows: Pillows can take a lot of room, so I recommend buying an inflatable one. The one I have linked, I have had for six years now, and it is STILL going strong. >Buy The EXTREMELY Packable Inflatable Pillows
- Sleeping Bag: One of the most critical aspects of getting a good nights sleep! Bringing a sleeping bag is a must. >Look At Prices
- Compression Pack: This compresses your sleeping bag, so it is easier to pack! >Buy a Compression Pack
- Sandals: I hate wearing my hiking shoes when I am hanging around the campsite, so bringing some sandals for leisure is a must for me. I just bought these, and they are super comfortable. Perfect for camping. >Check Out These Sandals
- Trash Bags: Everything you pack in, you must pack out. Bring a few trash bags with you.
- Printed Campsite Reservation: You have to pick this up at the ranger station and hang it outside your tent.
- Toothbrush, Toothpaste, Medicine & Toiletries
- Bear Canister: You can rent this at the ranger station. I decided to buy one just because I will probably use it many times. >Buy Bear Canister Here
- Bear Canister Holder: The bear canister didn’t fit in my backpack, so I packed it into this carrying case and clipped it on the outside of my bag. >Check Out This Bear Canister Carrying Case
- Bear Spray: You never know if you need it. I bought mine at REI, and I always had it by my side (And yes if you are wondering I did see bears.) Please note that if you are flying to Seattle and you bring this on the plane, it will probably get confiscated. >Buy Your Bear Spray Here
- Fire Starter: If you want to start a fire, this is an easier way. Just pile up the wood on top, and you are golden! Please note that only a select few campsites allow fires. Also bring matches just in case. >Buy This Cool No Match Needed Fire Starter
- Water Reservoir: You probably need more water than a water bottles worth. Great thing about this reservoir is that it doesn’t have the plastic taste. >Here Is My Water Reservoir
- Water Filter: I tend to drink a ton of water. There is a lot of areas where there is water available. >Here Is My Water Filter
- Sanitation Trowel: You never know if you might need it. >Buy One Here
- Olympic National Park Map And Book: I started buying maps and books for national parks to help me plan. You can still get a map at the visitors center, but I love that this one is waterproof and more detailed. >Buy My Map >Buy My Book
Join my Newsletter to receive my free Backpacking Checklist!
Subscribe to have posts delivered straight to your inbox!! PLUS, get my FREE backpacking checklist!
Bear Canisters
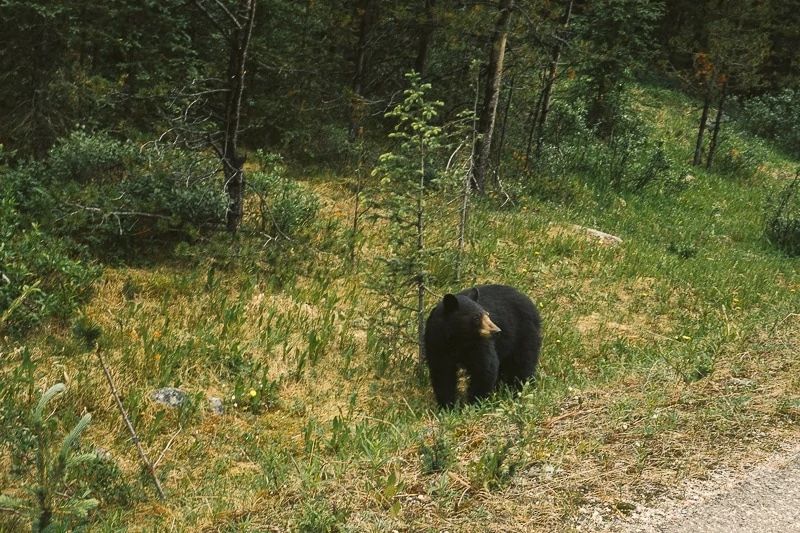
I know I briefly mentioned bear canisters on my packing list above, but I wanted to make sure it is understood that bear canisters are a must on this trail. Feeding bears can get them killed so please bring a bear canister with you. I bought mine at REI, but you can also rent them at the ranger station. Call in advance to make sure they are available because they might run out.
Toilets
Sol Duc Park, Heart Lake, Lunch Lake, and Deer Lake have vault toilets. To avoid the toilets filling up, please urinate on rocks. If you need to, you can bury solid waste 6-8″ deep and 200 feet away from campsites and water. Pretty much bring a shovel just in case.
The High Divide Trail – Seven Lakes Basin Loop
- Distance: 19 miles round trip
- Elevation gain: 4000 feet
- Difficulty: Hard
- Trail Guide: Link
Ahhh the High Divide Trail. It is a great trail that many people have on their backpacking bucket list. Since I was determined to explore the majority of the Olympic Peninsula this summer, I decided that I NEEDED to complete this trail. I was able to obtain a permit at the Canyon Creek campsite for a night and let me tell you that this was a huge mistake.
That means that we had to backpack 16 miles in one day. I do NOT recommend attempting what we did. If you do obtain a permit at one of the Canyon Creeks campgrounds, do yourself a favor and extend your trip for another night near Heart Lake. You will enjoy your time a lot more.
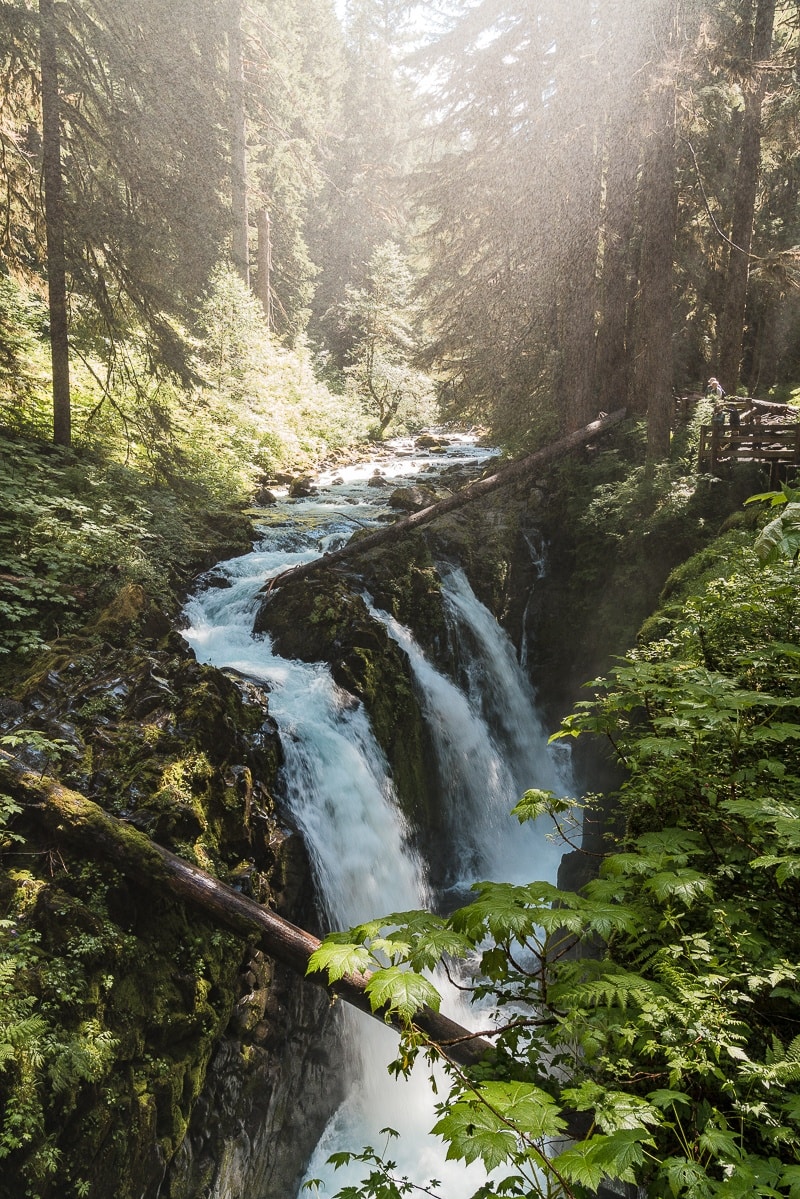
So the start of this 19-mile loop trail is at the Sol Duc Falls trailhead parking lot. This area can get pretty busy thanks to the short and easy Sol Duc Waterfall trail. There are usually many families enjoying the views of the rainforest and the waterfall. I’ve seen Sol Duc Falls a few times now, and I enjoy it most in the morning when the sun is radiating throughout the rainforest.
Now, in this blog post I will be describing my experience on this trail, which was the counterclockwise way. If you are attempting this counterclockwise like me, you need to cross the bridge to get to the start of the high divide trail. If you are going clockwise, then your start of the trail is near the Sol Duc Falls shelter shown below.
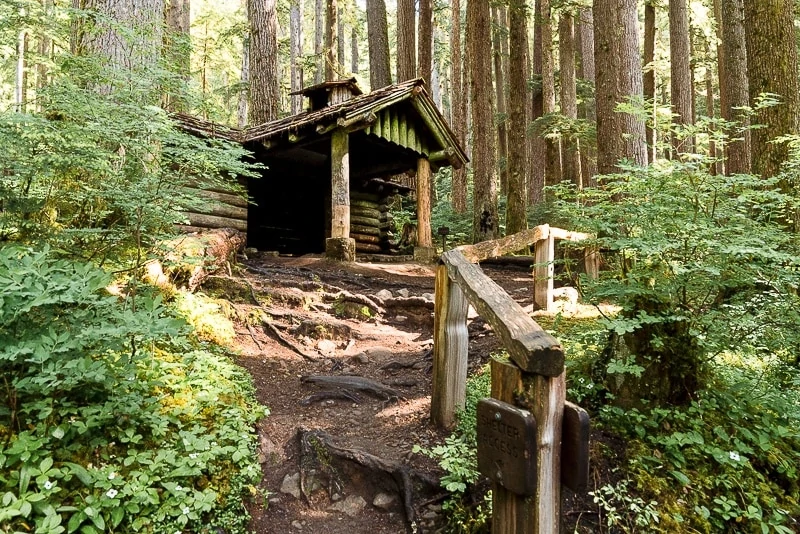
The area of the trail after Sol Duc Falls is uphill through many trees. The views aren’t spectacular just yet, but you start to realize just how peaceful this trail is. There aren’t many people on the trail, and all you can hear is the river water flowing.
Eventually, you will get to Deer Lake. A lot of people like to day hike to this lake and take in the views. There is a toilet and many campsites scattered throughout. I liked this lake but it wasn’t exactly my favorite. I feel like the views get increasingly better after Deer Lake.
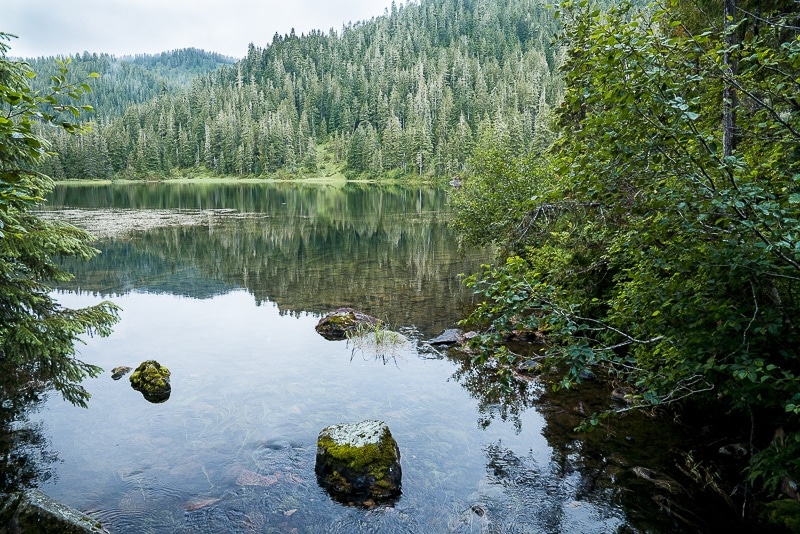
A few miles after Deer Lake is when you start to see the glorious views. The higher the elevation, the more the trees began to clear out, and you are left with beautiful views of mountains, as shown below. Now I will warn you that it was a super cloudy day when I hiked this trail. I was a little sad that I couldn’t always see the mountains because I am obsessed with mountain views. But I did feel like the clouds added more character to my photography.
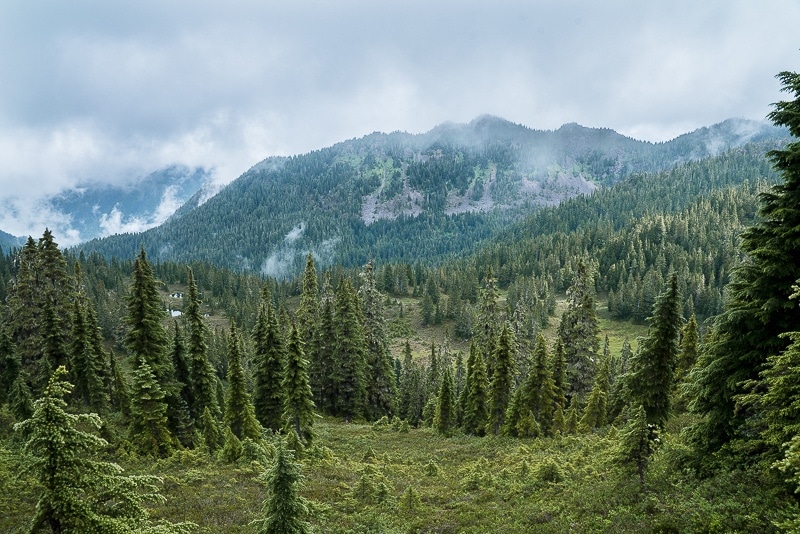
We started to see wildflowers, which is always a plus! I loved how they added color to the gloomy cold day.
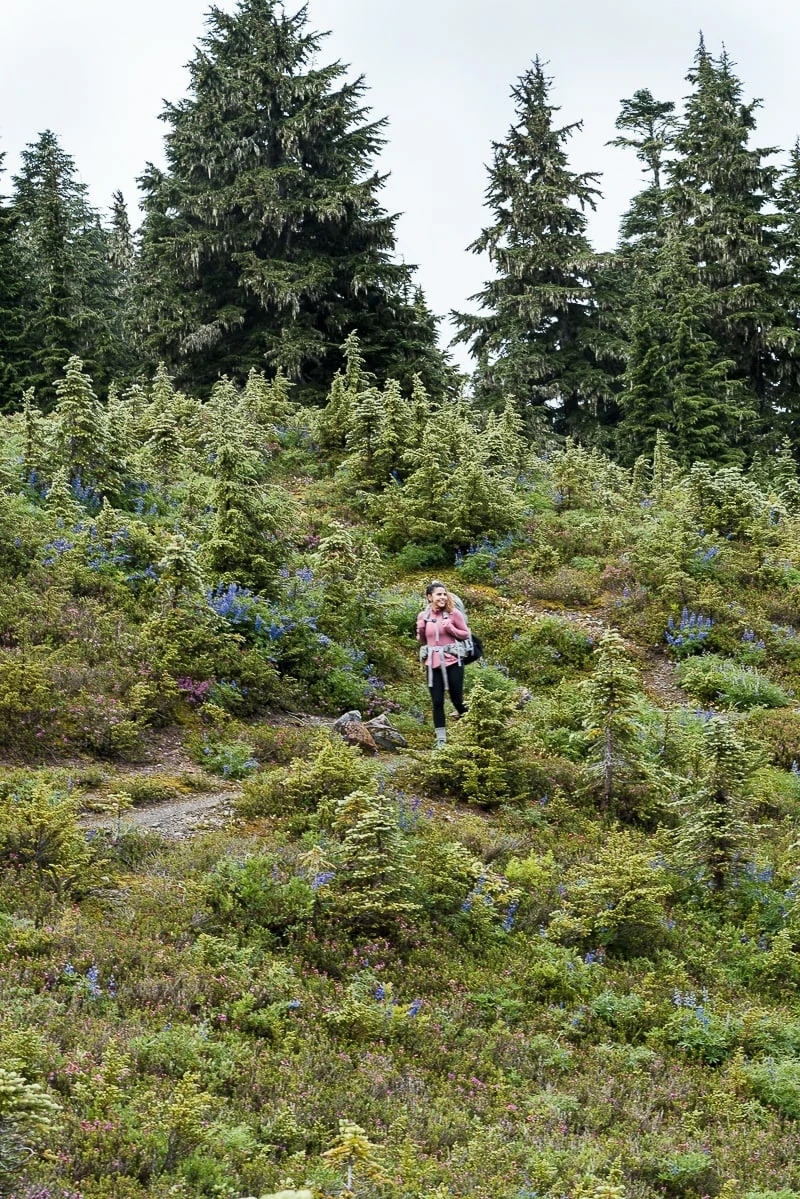
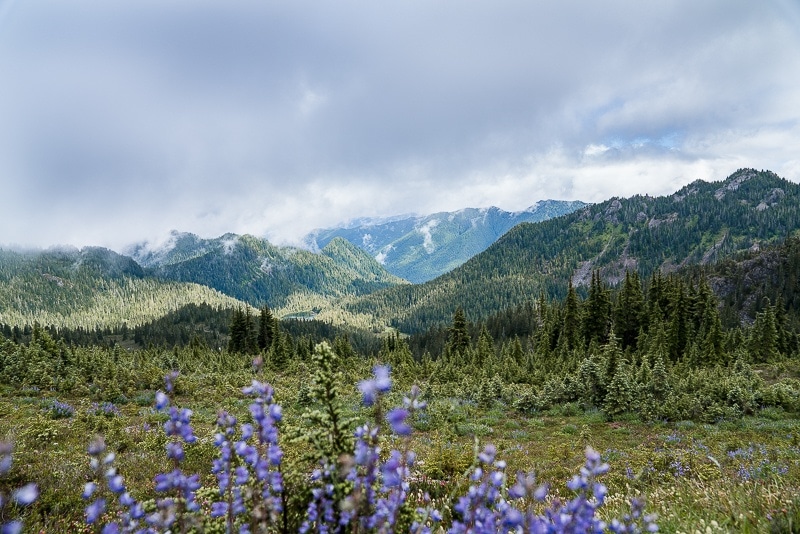
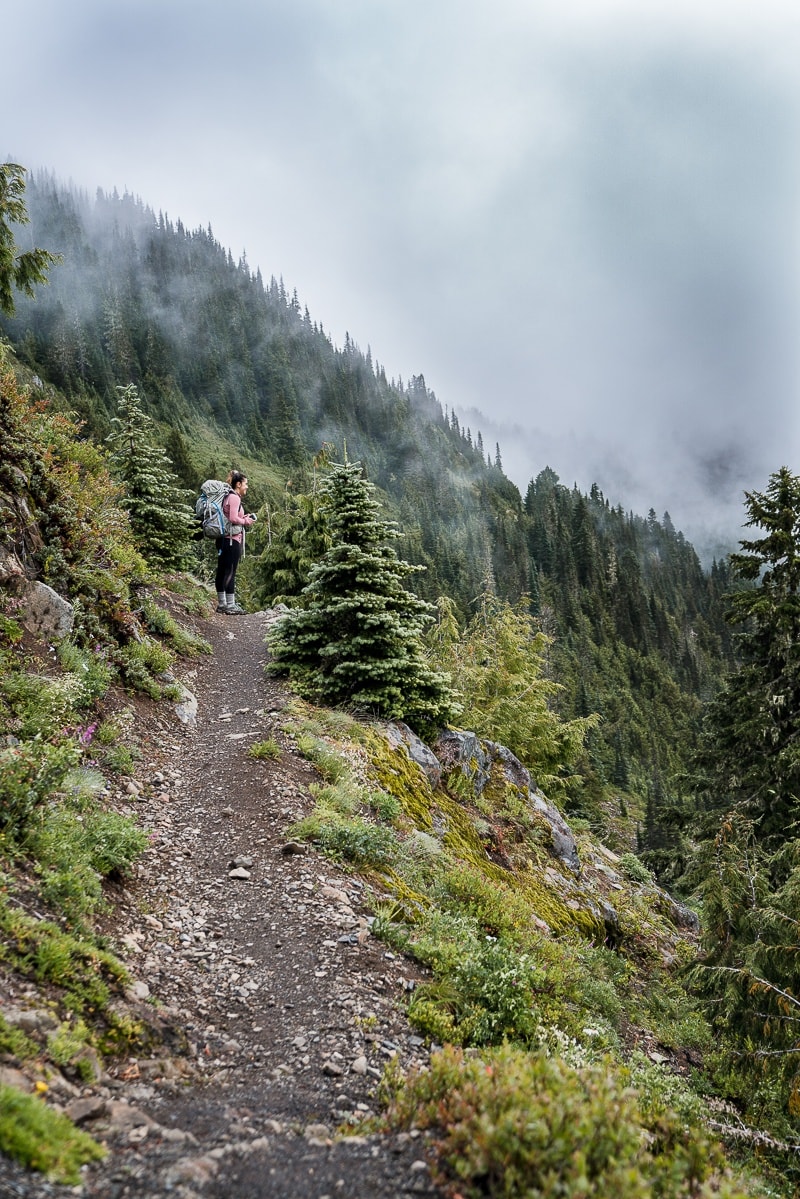
Eventually, you will be walking on a ridge. This is what upset me the most of our trip. The fog was not letting up in this area. I had a feeling that the views were incredible, but the fog was being extremely stubborn. Luckily it wasn’t like this throughout the whole hike. We did eventually get some great views. I will say that this is when I felt like the elevation gain became pretty intense. Just take your time and enjoy the views (hopefully you have them).
There was some scrambling before getting to the ridge area. A lot of large and small rocks piled around the trail. To me, it didn’t seem too challenging to get through. I have been through worst rock scrambling trails like the Canyonlands Needles backpacking trail. But I still wanted to warn you about it.
After the ridge area are the views, you have been waiting for! The seven lakes basin. If you are like me and can’t get enough of blue-green sparkling lakes, then you will love the views here! Plus you also worked very hard to get here! Walking on the ridge is not an easy feat, so sit back and relax and take in the views.
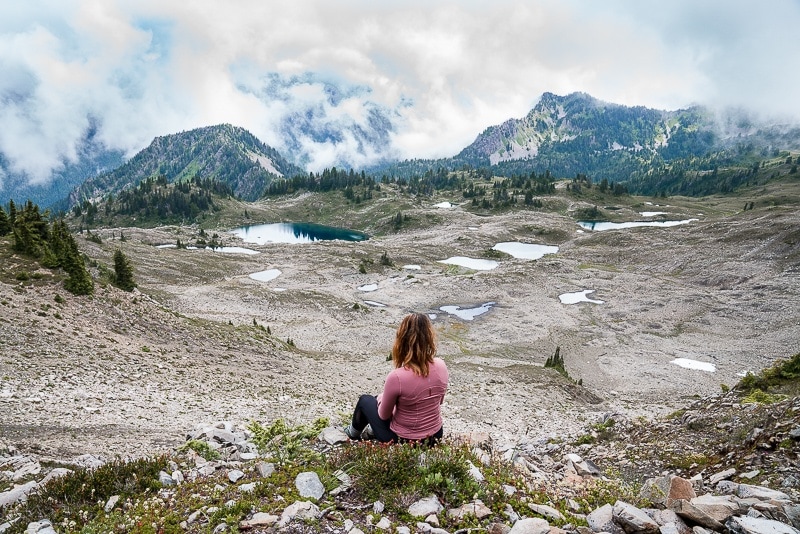
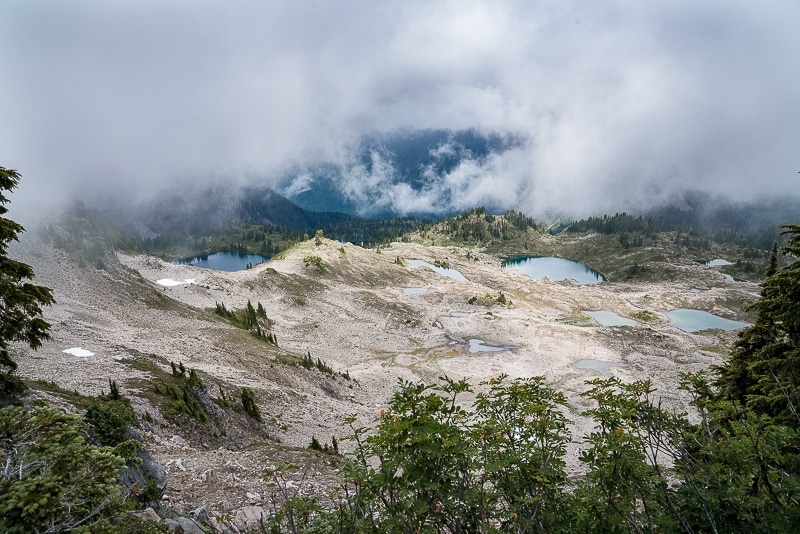
There are two viewpoints that I highly recommend getting to, and that is the Lunch Lake overlook and the Bogachiel Peak Overlook. Both views are spectacular and only require getting off trail for a little bit. Many people also make the trek to Hoh lake. Since we were already hiking 16 miles in a day, we decided against checking out Hoh Lake. But, if you have the time and energy, why not try it out?
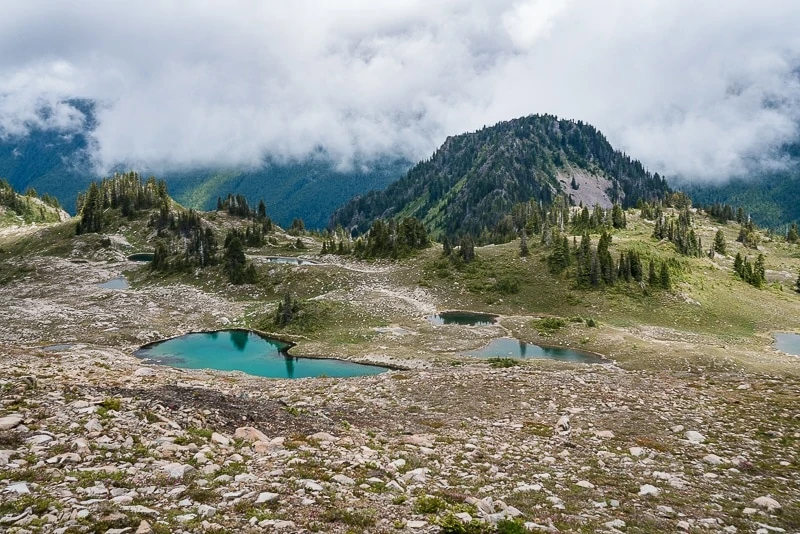
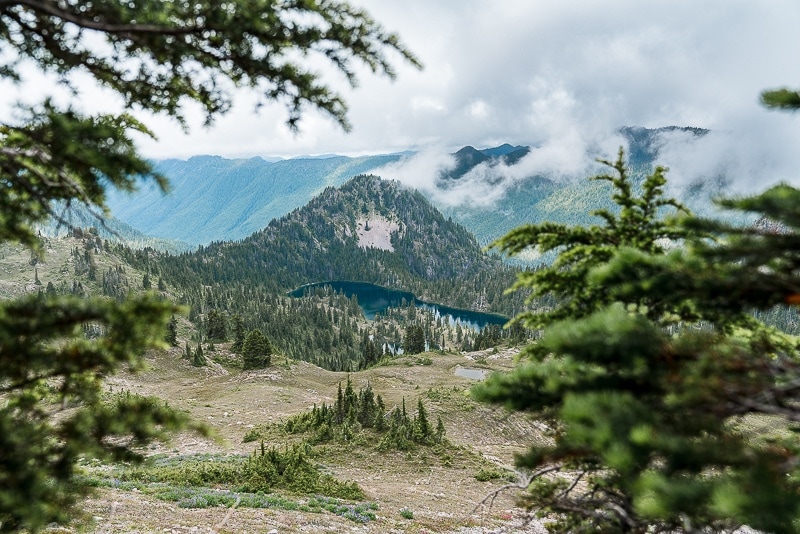
After Bogachiel Peak we saw even more lakes. I was surprised because I thought the peak would have the last and the best views of lakes. It turns out I was wrong. The lakes after the peak were absolutely beautiful.
Download my Washington Hiking Checklist!
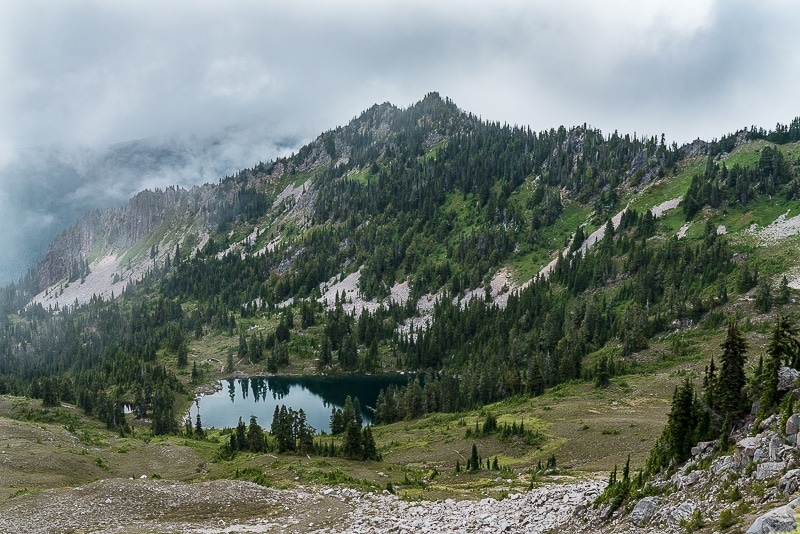
My favorite picture of the day was the picture shown below. The views of Heart Lake and the mountains in the background made my day. We also saw some bears near Heart Lake, but they were too far away to take pictures of them.
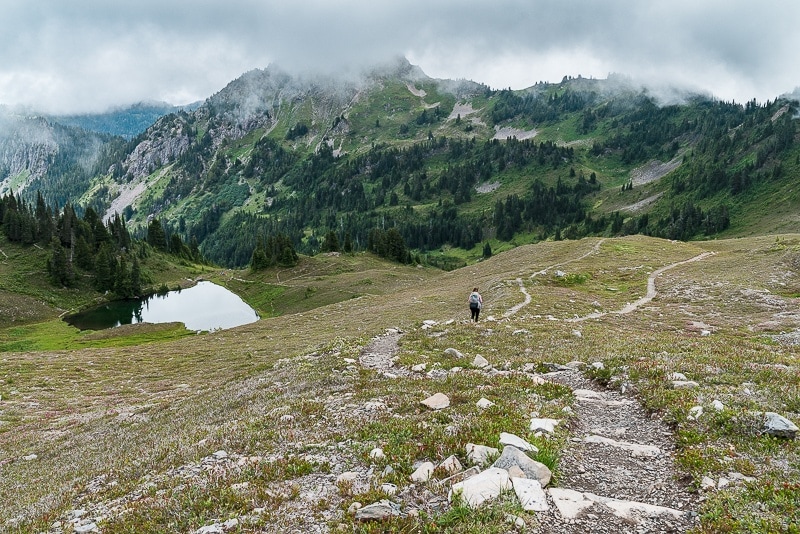
After Heart Lake, we stopped at Sol Duc Park to grab more water. I felt like this was the best campsite on the whole trail. There was wildflowers, a creek and it was at the midway point of the trail. If I were to do it again, I would make sure to camp in this area.
After Heart Lake, you start to go down in elevation, which means that you once again go through the thick rainforest. There aren’t many views at this point. But I will say that I enjoyed the Rocky Creek Campsite area. The rainforest, at this point, seemed pretty magical.
Last Thoughts On 7 Lakes Basin
Well, I hope all of this helped you plan your ultimate backpacking trip through the Seven Lakes Basin. Let me know if you have any questions. If you want to plan some even more fun experiences in the Olympic Peninsula here are some other helpful posts:
- Backpacking Through Enchanted Valley
- Everything You Need To Know About Hurricane Ridge
- Ultimate Guide To Rialto Beach
- Camping Guide To Second Beach
- The Absolute Best Hikes In Olympic National Park
- The Perfect 2-3 Day Olympic National Park Itinerary
Get my free National Park Checklist
When you join the newsletter!
Pin For Later
